Tutorial: Vape Coil Building – Beginners
So, you are thinking about or have decided to enter into the world of rebuildable atomizers. Here we will try to give you everything you need to know to rebuild a simple 1.2 ohms single micro coil and .6 ohms dual micro coils for your RDA. Before we get started I want to mention that there are certain risks associated with short circuits in any electrical device as such please follow the steps in this guide to ensure you are building coils and vaping safely.

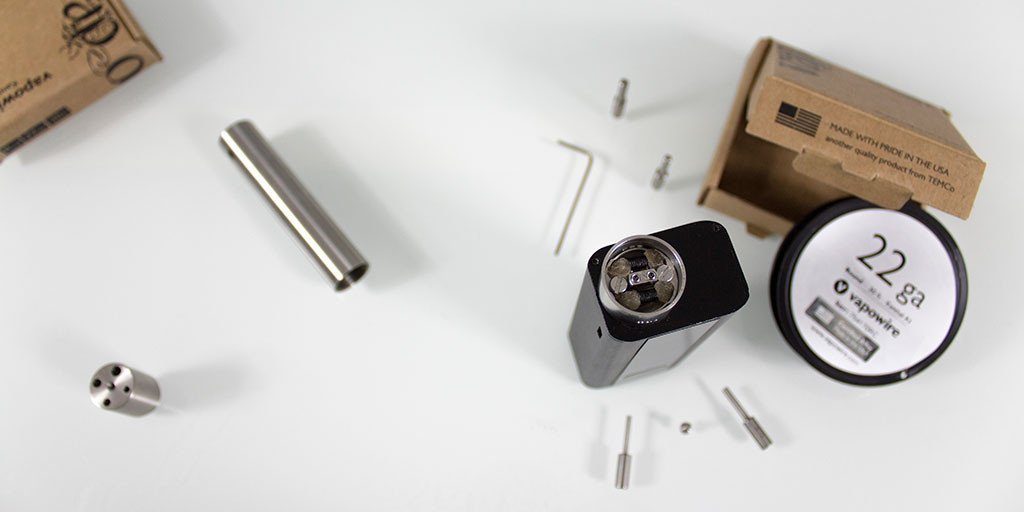
1. What You Will Need To Build Coils:

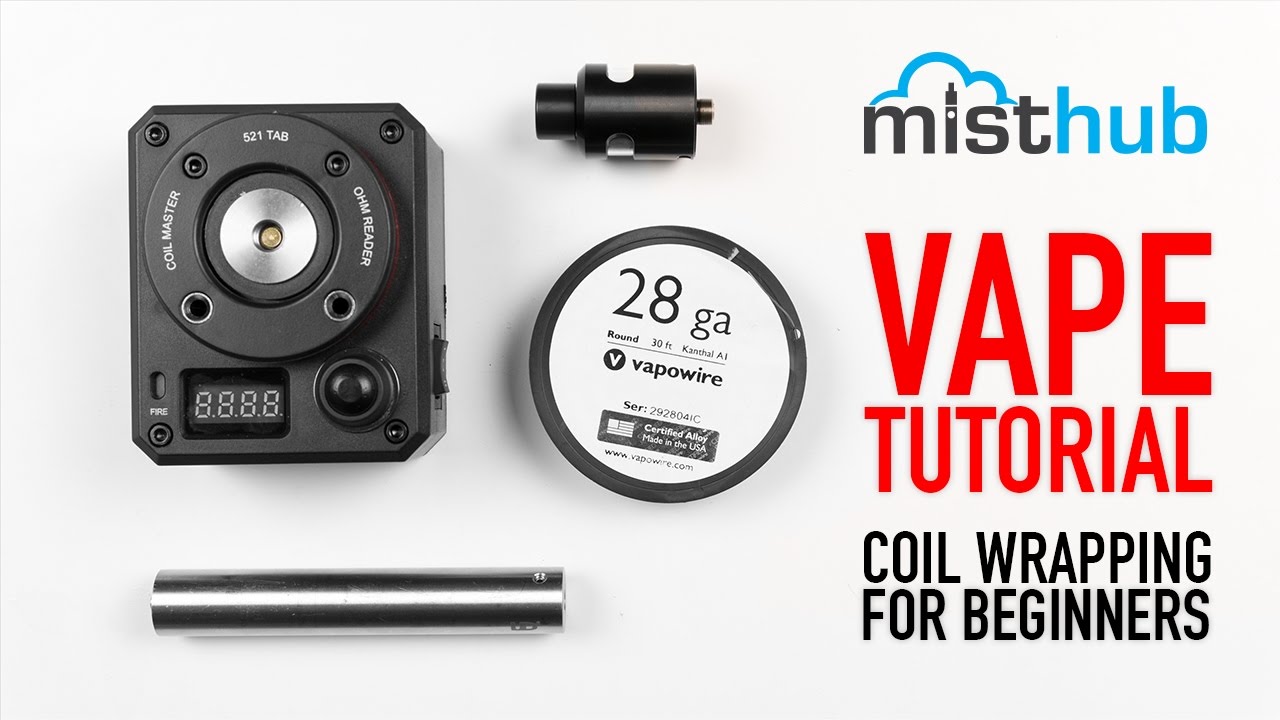
- An ohms reader
- RDA of your choice
- Resistance Wire: Kanthal or NiChrome (We are using 28ga Kanthal in this tutorial)
- Small blue 2mm screwdriver (included with most RDA’s) or 2mm drill bit/ 14ga blunt tip needle
- Additional small screwdriver or Allen key that fits your RDA’s screws.
- Small butane or propane torch.
- Tweezers (preferably ceramic tipped), needle nose pliers, or forceps.
- Small wire cutters or nail clippers
- Scissors
- Wicking Materials: organic cotton, silica, eko-wool etc.
- E-juice
- A little time and patience.
2. Before You Get Started
If you do not have an ohms reader please do not attempt to build your own coils Now that you have all the supplies you need, before you get started wrapping coils you will want to figure out how many wraps your coil will need to have to reach the desired resistance. To do this there are various tools available. We recommend the coil wrapping calculator at www.steam-engine.org by adjusting the variables like wire size (28ga), coil type (single) target resistance (1.2 ohms), inner coil diameter (2mm) leg length (4mm) this calculator will tell you exactly how many wraps you need. For this tutorial our 1.2 ohm single coil will need 8 full wraps.
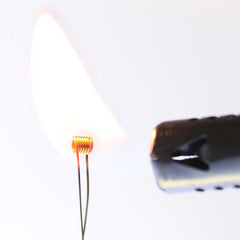
Oxidize the Wire
First you will want to cut a piece of your kanthal resistance wire. Although 3 inches is likely enough it is often easier for beginners to have a little extra to hold onto so I recommend cutting a 4-5 inch piece of wire. You will then want to hold the end of your wire with your tweezers, pliers, forceps, etc. Light your torch and carefully heat the kanthal wire at one end until it glows orange then slowly move the torch down the entire piece of wire. Give your wire a moment to cool then grab the other end of the wire and repeat. Oxidizing the wire will make it less “springy” and easier to work with.
3. Wrapping Your Coil
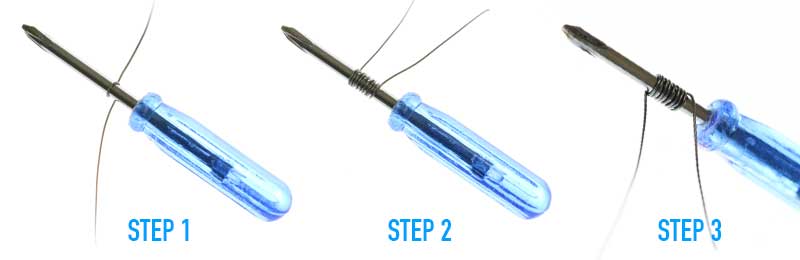
You will need your tweezers, small blue screwdriver and your wire for this part. You want your wire to be on top of the screwdriver close to it’s handle. Hold the end of the wire nearest the screwdriver firmly with your thumb. You then will start wrapping your wire around the screwdriver until you have reached our target of 8 wraps. Do your best to keep the coils as close to one another as possible without any overlapping. It is important to try to keep the wire tight through the process to eliminate as much slack as possible. Once you have made your 8 wraps both leads should be facing the same direction. Double check your number of wraps by counting them on the side of the coil that is opposite of the leads. Once you are sure your coils has 8 wraps you can hold one lead firmly with your fingers and pull on the other lead with your tweezers or pliers then repeat with the other lead. This is to remove any extra slack your coil might have. DO NOT REMOVE YOUR COIL FROM THE SCREWDRIVER.
Wrapping Your Coil Using a Kuro Coiler
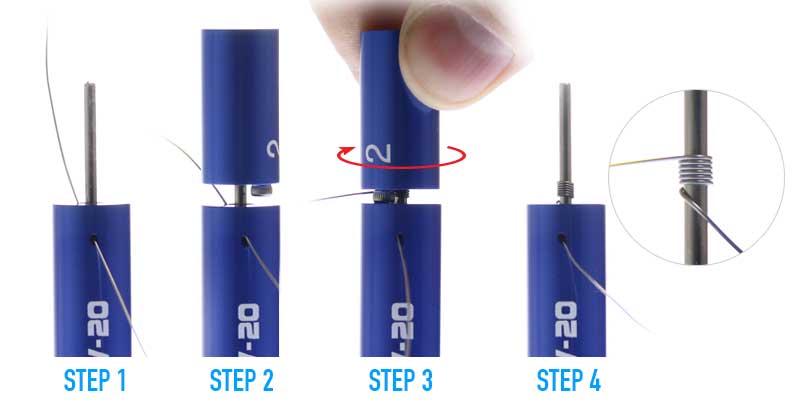
We will use the 2mm Kuro Coiler here. First insert wire into the hole 1 on the side of the handle leaving approximately 1/2” of wire sticking out from the hole in the handle. Hold the end of the wire against the handle so it cannot slide back out. Pull the loose end of your wire around the shaft. Place the top winding piece on to the shaft with the pin towards the handle. Turn the top winding piece slowly so it catches the wire and starts wrapping. Be gentle. Excessive pressure will cause the wire to wrap over itself. Once you have 8 wraps remove the top winding piece and straighten the wire that sticks through the hole in the handle. Adjust or straighten the leads as needed then remove the coil from Kuro Coiler’s shaft and slide it on to your small blue screwdriver for installation.
4. Installing Your Coil
Next we will want to take the build deck of your RDA and loosen the post screws most of the way. We do not suggest removing the screws completely because they are easy to lose and hard to put back in when your hands are already full. You will then take your coil (still on the screwdriver) and place one lead in your positive post hole and the other in your negative post. Using the screwdriver currently inside your coil try to position the coil towards the center of your RDA. Once you have it roughly positioned you can tighten your post screws. Be careful not to over tighten or you might cut the wire inside the post and have to make a new coil. Once your coil is mounted securely trim the leads as close to the posts as possible.
5. Testing Your Coil For Shorts

Next you will want to take your RDA and screw it on to your ohms reader and turn it on to be sure the new coil on your RDA doesn’t have a short. It should measure close to your target resistance of 1.2 ohms but it is important to remember it is quite common and normal for coils to have a slight variance in resistance of up to .2ohms. If your coil is displays the proper resistance within .2ohms you are ready to move on to the next step. However if your ohms reader is not reading your coil or displays a resistance more than .2 ohms different than your target resistance there is a problem that needs to be fixed. Usually issues are easily fixed. Check to be sure your RDA’s post screws are tight. Check your coils positioning to make sure it isn’t touching the deck or posts. Be sure your atomizer is screwed completely into the ohms reader. If these steps corrected your problem you are ready to move on to the next step. If those steps did not correct your problem try making another coil. If you continue to have an issue there might be a problem with your atomizer or with your ohms reader.
6. Test Firing Your Coil and Eliminating Hot Spots
Now that we have made sure your coil is installed properly and there are no shorts, you are ready to put your RDA on to your mod. Once your RDA is installed onto your mod you will want to briefly fire your mod until the coil begins to glow. Once your coils begin to glow stop firing your mod and gently squeeze your coil together with your tweezers. Repeat this process until the coil glows evenly starting from the center moving towards the outer wraps.
7. Wicking Your Coil
There are many things you can use to wick your coil, organic cotton, silica wick, eko-wool (silica braided around cotton) are all very popular for different reasons and uses. For this purpose we prefer organic cotton for its superior flavor and wicking abilities. You will want a piece of material just big enough to snugly fit inside your coil leaving about half an inch on either side. It sometimes helps to wet and twist the end of your wick to get it started. Push it in from one side of the coil and pull it out the other side. If It doesn’t go through easily you likely are using to much material for your wick. On the other hand if your wick is sliding loosely inside the coil there is not enough material. Once your wick is threaded though the coil take the wick sticking out of each side and trim them so they are just long enough to be folded over to sit on the deck of your RDA. Once your wicks are trimmed wet them with a few drops of e-juice and fold them on to the RDA deck paying mind not to push them underneath the coil so air can reach the entire coil.
8. Test it again!
After wicking your coils it is likely they were pushed on or moved around a little. It is important to recheck your RDA’s post screws are tight. Then recheck your resistance on an ohms meter. Be aware it is possible that your resistance might have changed slightly +/- .2ohms but this is normal. If everything checks out you are ready to move on to the next step. If there is a problem you will need to recheck everything working your way backwards until you find the problem.
9. Vape and Enjoy!
You have successfully built a 1.2ohms single coil for your RDA. Saturate your wicks with your favorite e-juice, replace your RDA’s cap, vape and enjoy! You deserve it!
Dual Coils

We said we would teach you to build .6 ohms dual coils too, but you already know how. When you are using dual coils you are creating a second path for electricity to follow which cuts the resistance in half. For example 1.2ohms / 2 = .6ohms. Simply make and install 2 of the 1.2 ohms coils we just made. Be sure to make the coils as close to identical as possible. Try to install and position them similarly. When test firing your dual coils they should fire at about the same time and glow evenly if one glows brighter than the other check your screws. If it continues to glow unevenly try squeezing the coil that glows brighter with your tweezers. Let it cool then test fire again. Repeat until they glow evenly outward from the center. Wick them similarly. Vape and enjoy!
A Note On Safety
It is important to note when building or rebuilding your own coils it is absolutely crucial to know the limits of your device, hardware, and batteries. Never build at resistances that will exceed their safe operating capacity. For more information on this please see our tutorial on Battery Selection and Vaping Safety. Exposed coils when installed and fired on your device are very hot please exercise caution. If you do not have an ohms reader please do not attempt to rebuild your own coils.

NEW: Suorin
NEW: Starbuzz Carbine Hookah
Comments
Leave a comment